Can i just create only 1 Orders performance dashboard for all the sales person but when a sales person from Southeast Asia region open it then he can only see Southeast Asia orders data, and if a sales person from Oceania region open the same dashboard then she can only see Oceania orders data ?
Yes, you can. This capability is called Row-level Security.
Row-level security can be implemented in Tableau with many different methods such as:
- User filter
- Entitlement table
- Database Row-level security such as: Oracle Virtual Private Database (VPD) or SQLServer Row Level Security (RLS)
You can check out Tableau excellent documentation to use User filter method here & Entitlement table method here.
But what is the best solution to implement row-level security if flexibility & performance are a very important factors?
Database built-in Row-level Security technology is the best solution because:
- best performance because it is a built-in technology inside the database
- the data stay in the database
- any applications that query data from this database can also use the row-level security feature
- any improvements from the database vendors will benefits all the applications
- full support from the database vendor
Of course not all databases out there support this row level security.
Today i will show you on how to enable row-level security using SQLServer Row Level Security (RLS) technology and how to use it in Tableau. You can read more on SQLServer RLS here.
First let me show you the tables that we will use today.
Orders table contains every order transaction data for all Regions.

People table contains the person name in charge of specific Region.

SQLServer RLS policy use SQLServer login username to restrict access to certain data. As you can see, we don’t have SQLServer login username in these 2 tables, Orders table only contains Region field and People table only contains the person name and their respective Region. So we must create a new table that store each person name and their SQLServer login username.
Yes with SQLServer RLS technology, every person must have their own SQLServer login username. You cannot share 1 SQLServer login username with many persons. If your SQLServer already use Active Directory authentication then it will be easier to setup because every person already has their own SQLServer login username.
Ok let’s continue with the first step to make this happen by creating a new table that contain every person name with their respective SQLServer login username. After that we will create a new database View by joining this new table with People table and Orders table so each Order record will have their own SQLServer login username.
1. Create the PeopleSecurityTable inside SQLServer for RLS
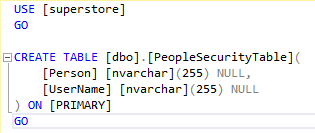
Person field will store the Person name and will be the link to “People” table, all the people inside “People” table should also inside this new “PeopleSecurityTable”. The UserName field will store the SQLServer login username for every person. SQLServer RLS will use this “UserName” field to limit the data that each user can see.
You need to customize this to your requirements. Find the field inside your transaction table that can be used by SQLServer RLS to limit the data using the user SQLServer login username. If your transaction table doesn’t have SQLServer login username then you need to create something like “PeopleSecurityTable” as the linkage.
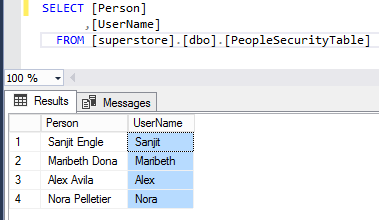
This is the example data for PeopleSecurityTable
2. Create a Database View with SCHEMABINDING
Let’s create a new database View with Schemabinding by inner join Orders table with People table and PeopleSecurityTable so each Orders record will have their own SQLServer login username. You must use WITH SCHEMABINDING, this is a requirement from SQLServer RLS technology.
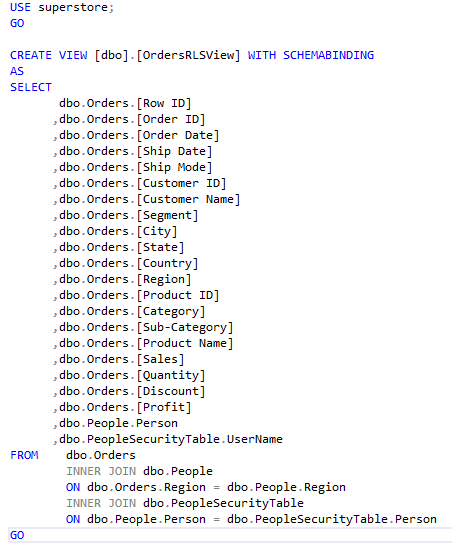
OrdersRLSView contains all Orders data and each order has their own SQLServer login username.
My local SQLServer still using 1 username for all users to share to login & query data. So let’s create a different login username for each person inside People tables.
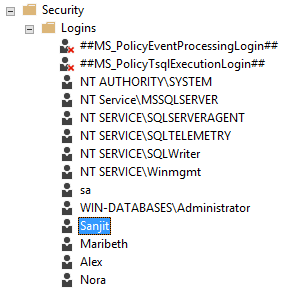
3. Create new Login username for every Person inside People table

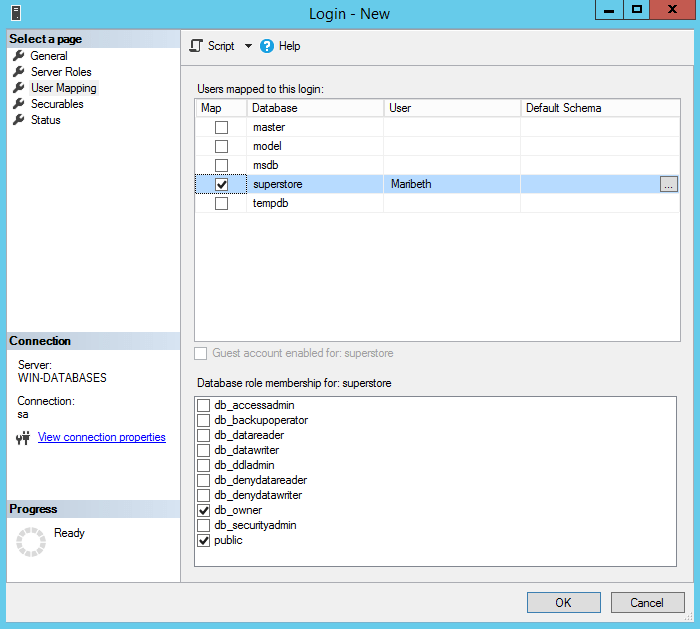

Ok i created 4 different SQLServer login username for everyone inside People table.
4. Create the RLS Function
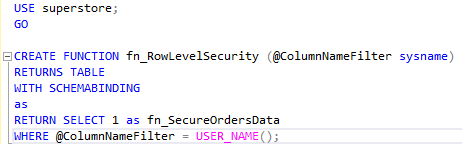
SQLServer built-in USER_NAME() function will give you the login username that the person use to login to this SQLServer. Then “fn_RowLevelSecurity” custom function will assign the login username from USER_NAME() as the ColumnNameFilter for SQLServer RLS to limit the data the person can query.
5. Create Security Policy on the View
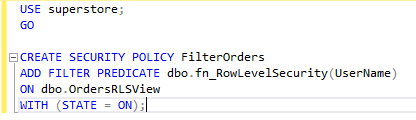
This new custom “FilterOrders” Security Policy will add a Filter Predicate to filter OrdersRLSView data using its UserName data. And “fn_RowLevelSecurity” function will set the UserName = SQLServer login USER_NAME() data.
This is how SQLServer RLS technology working behind the scene. SQLServer Function & Security Policy added to a View WITH SCHEMABINDING will force the View to filter the data based on “UserName” field and return only the records associated with this specific login “UserName”.
6. Let’s test querying Orders table using different login usernames
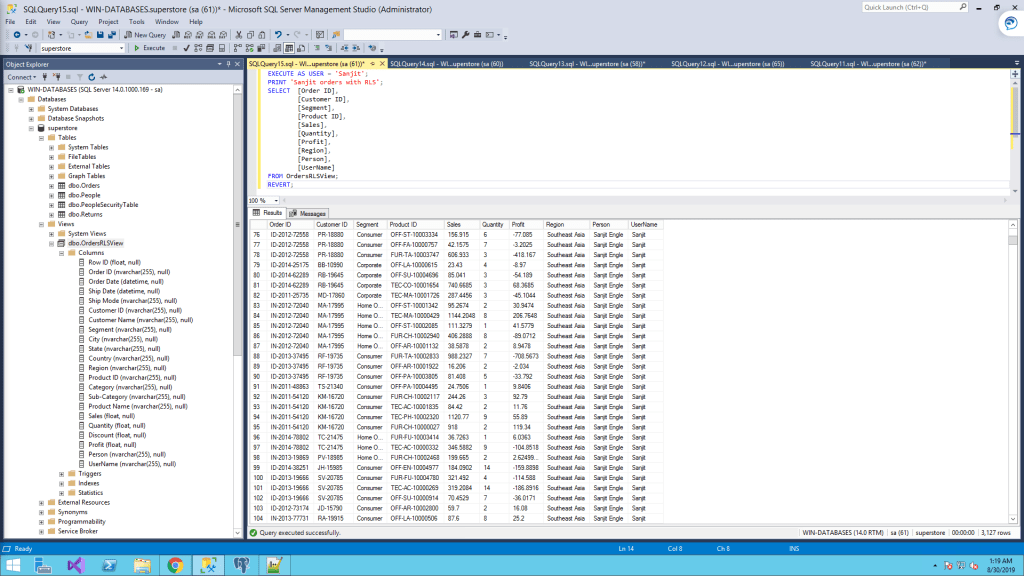


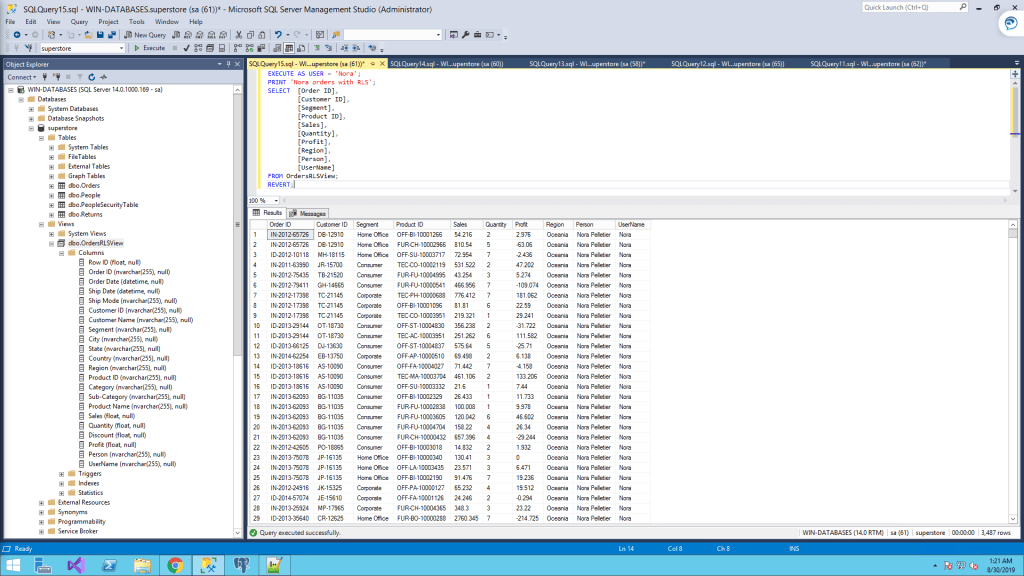
It’s working as expected:
- If you login to SQLServer using username “Sanjit” then you can only see Orders data from Southeast Asia region.
- Username “Maribeth” can only see Orders data from Central Asia region.
- Username “Alex” can only see Orders data from North Asia region.
- Username “Nora” can only see Orders data from Oceania region.
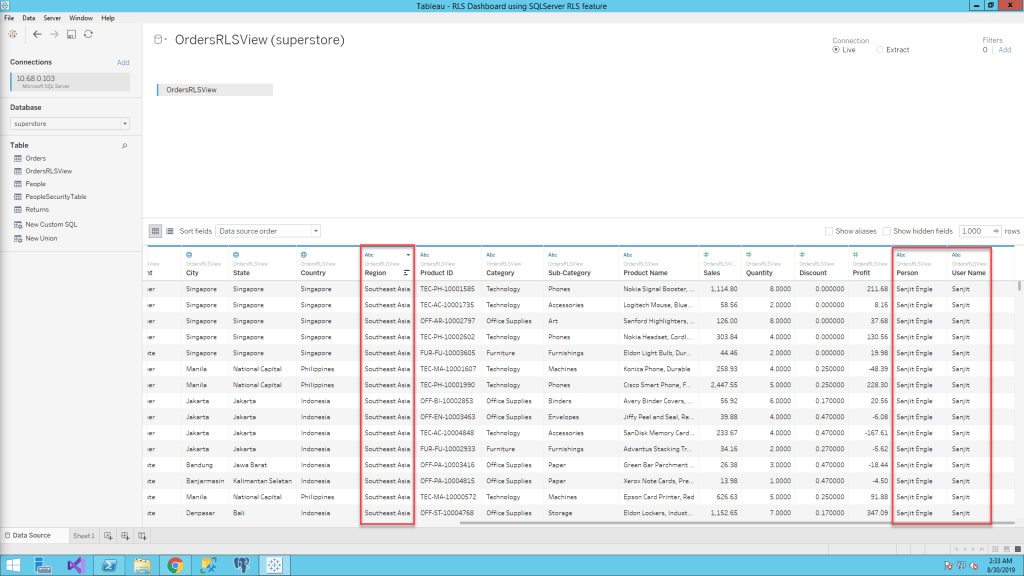
7. Let’s try it with Tableau Desktop
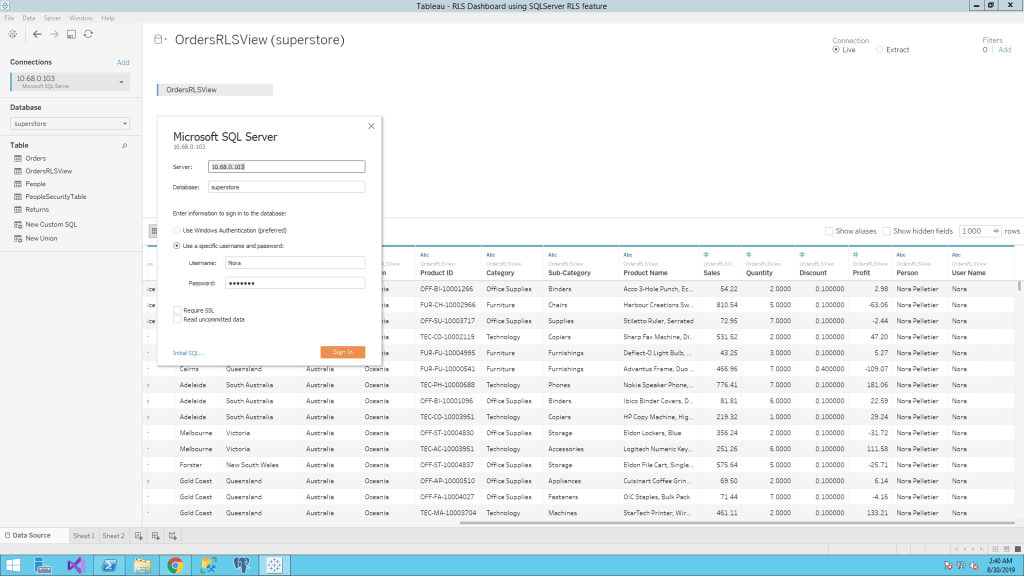
Open Tableau Desktop and choose Microsoft SQL Server and login with username “Sanjit”.

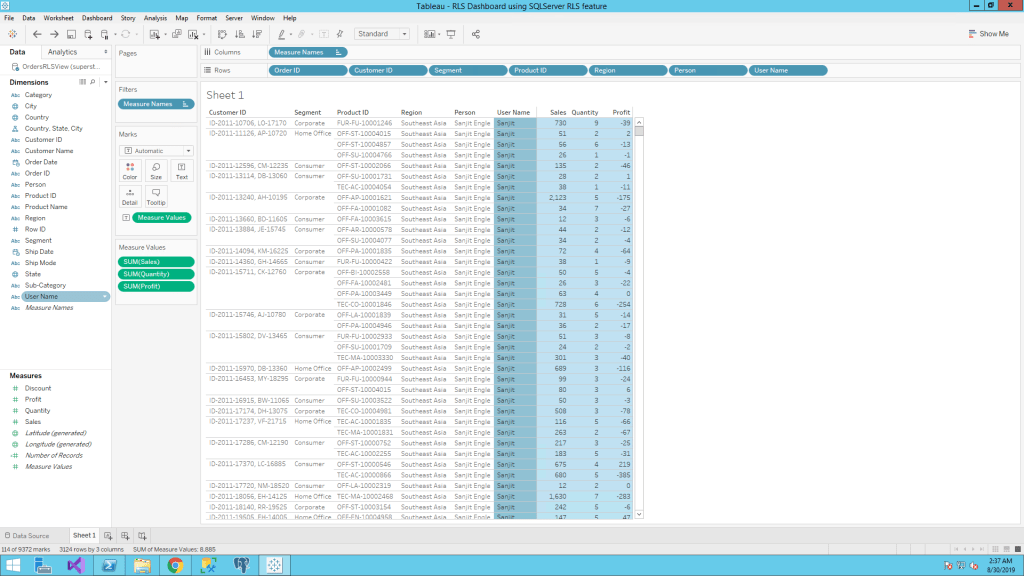
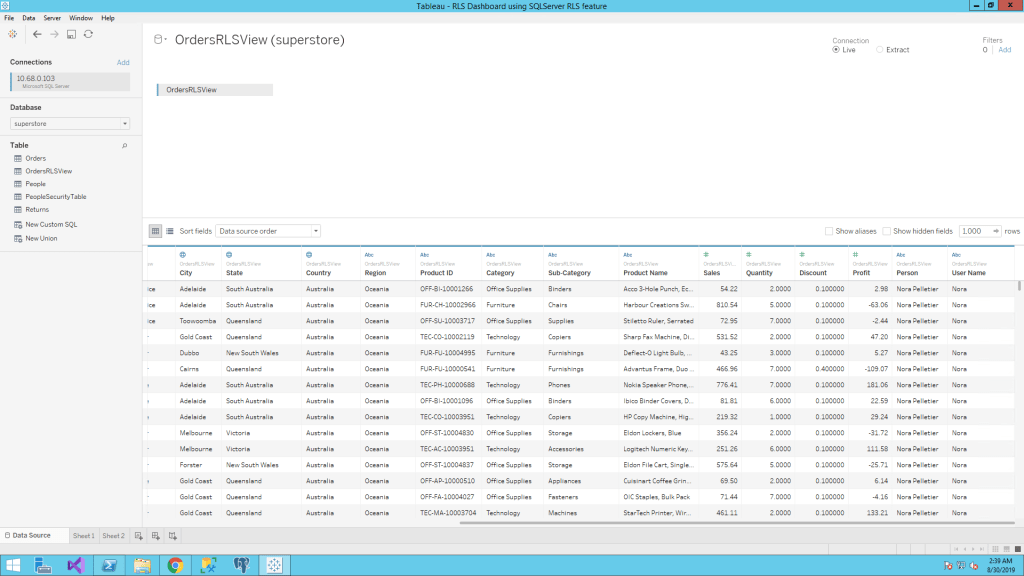
Double click OrdersRLSView and as you can see below, Sanjit can only see Orders data from Southeast Asia region.
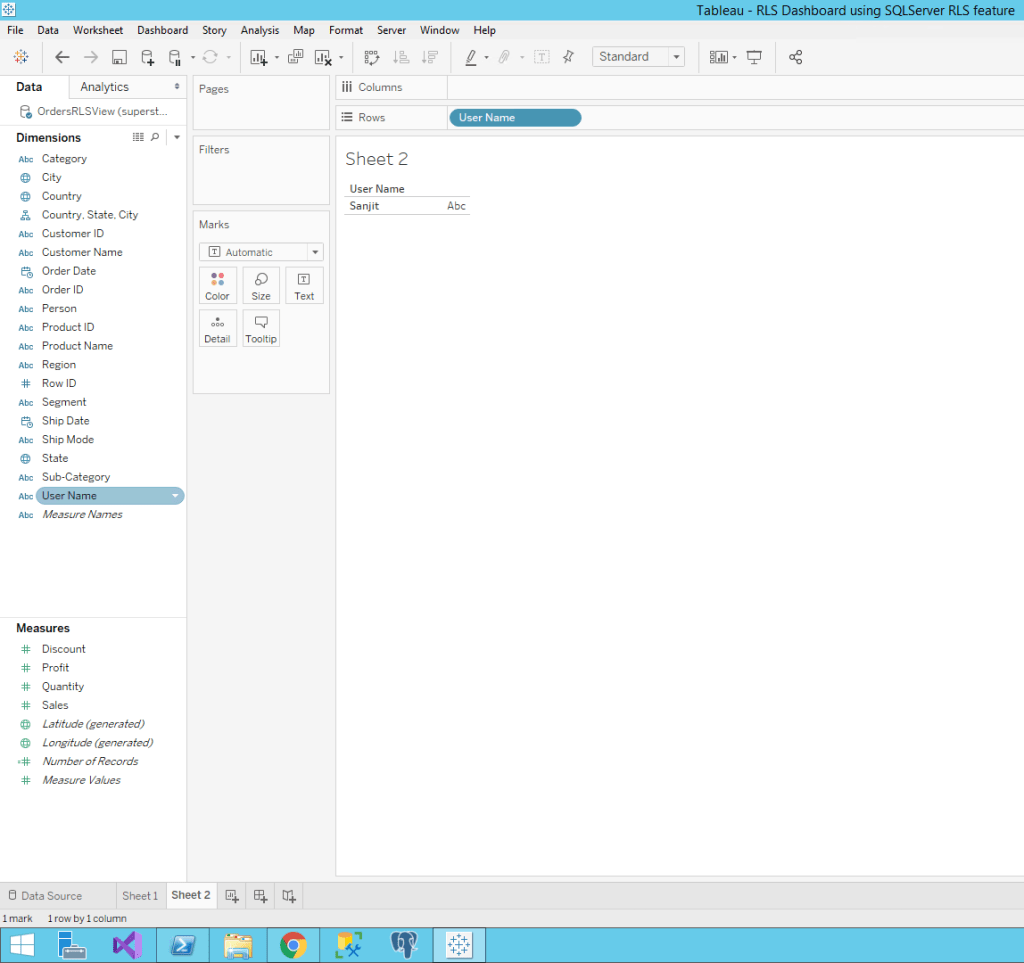
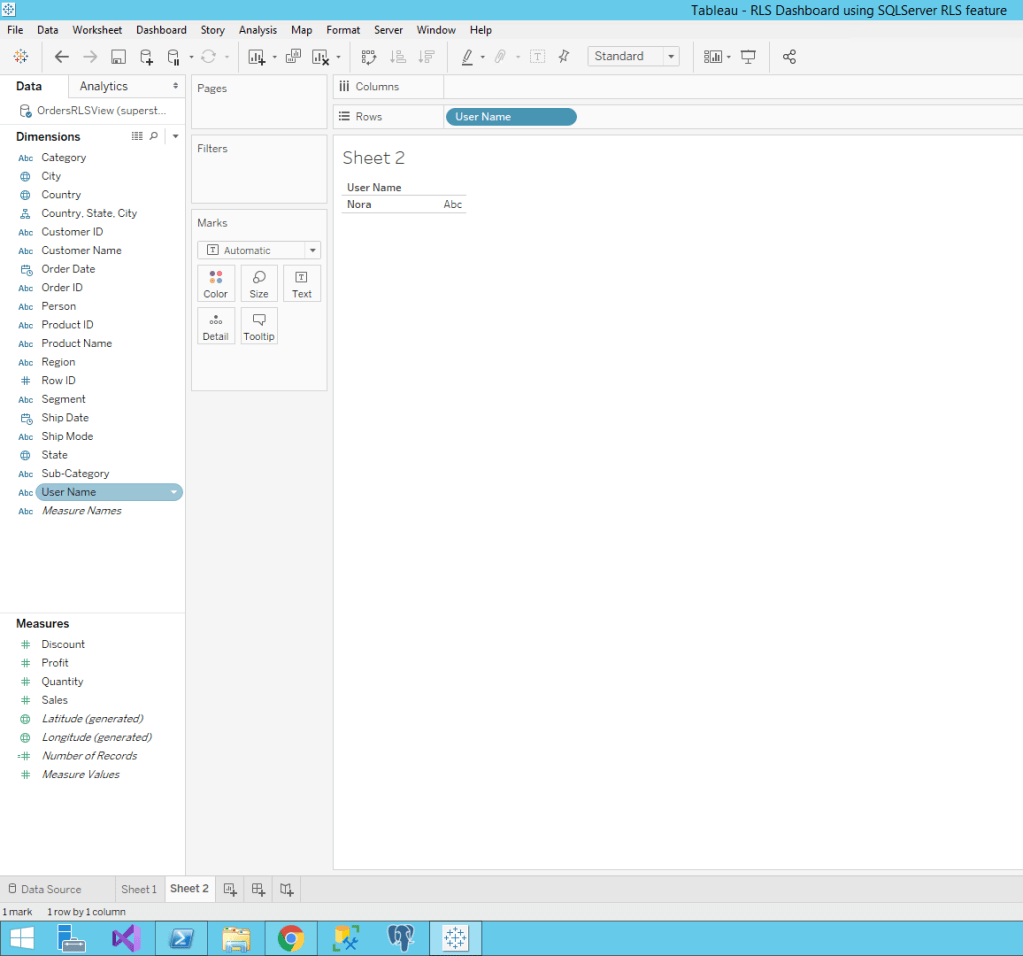
And Tableau show that there is only 1 username (Sanjit) in the View.
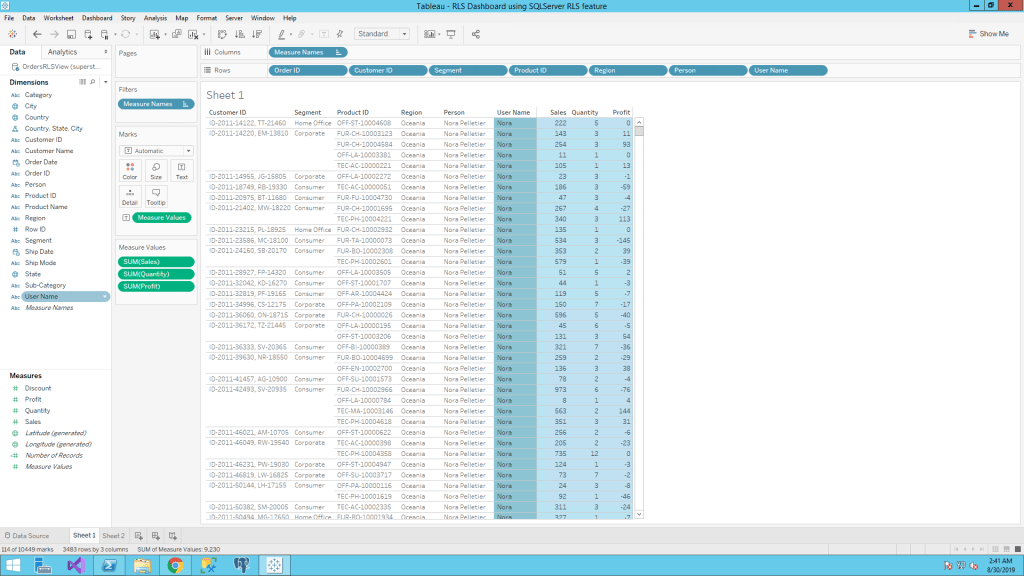
And it also working fine with username “Nora”.
Recommendation
Always try to use the Database row level security technology if possible because it will give you the best performance and it will works well with any applications using the database. You just need to create it once inside the Database and it will works well with Tableau or Excel or any other reporting tools that you may have.
Enjoy today friends.

[…] Row level security with SQLServer RLS […]
LikeLike